Monday, 24 September 2018

Create Custom Workflow in AX 2012

Today, I will be discussing about how to develop a custom workflow in AX 2012. Let's say we have a scenario in which we need to create a custom form for making any request and it requires approval from different authorities. Following are the steps for create custom workflow.

Step 1) Create a new enum type. Enum type will be used for defining the state or status of the workflow. For this right on base enum group in your project and select Base Enum option.

Step 2) Add following elements in the enum.


Step 3) Add this enum in your custom table and override the canSubmitToWorkflow() on table. This method will be used for defining workflow submission criteria or condition on which workflow will be enabled.


Step 4) Add another method for updating the status of the workflow.


Step 5) Now create a custom query.  Workflow will be using this query to define the tables and fields in order to define the data set available. For this right click on queries group in your project and create a new query.  Add your custom table as data source in query and set dynamic field value to yes in order to show all fields.


Step 6) Create a new workflow category. It will determine the module in which workflow will be enabled. For this right click on workflow category group in your project and create a new category. Set its label and select the module in which you want your workflow to be enabled. In my case I have selected Human resource module.


Step 7) Create a new workflow type using the wizard. For this go to AOT-> Workflows -> Workflow types -> Right click on it -> Addins -> Workflow type wizard.  You need to set out here workflow category, document menu item  and query.

Category      - Name of workflow category
Query           - Name of the query
Document    - Name of the display menu item for document form

On its generation following artifacts will be created.
1. Workflow type
2. Classes
      - Document class it will extend workflow document
      - Event handler class it will used for implementation of workflow events
      - Submit Manager class
3. Action menu item
     - Submit menu item - Points to submit manager class
     - Cancel menu item - Points to workflow cancel manager class


Step 8) Enable workflow on your custom detail form and custom list page. For this you need to set below mentioned properties on design of form.


Step 9) Add logic in Submit Manager class. I have create a separate method with submitLeaveRequest naming and calling it from main method of submit manager class.


Step 10) Create a new workflow approval element using wizard. For this go to AOT -> Workflow -> Approvals -> Add-ins ->  Approval wizard
Add following information on it and it will create list of artifacts
- Name of workflow approval
- Workflow document
- Document menu item
    -  Document field group

Step 11) Now add code in workflow event handler class and workflow approval event handler class.
Workflow event handler class code


Workflow approval event handler class


Step 12) Now add code in newly created Resubmit Manager class.


Step 13) Add workflow approval item in workflow type. For this expand your workflow type and add approval element in supported elements node.


Step 14) Now its time for designing the workflow. I am creating a workflow in human resource module. So for this Go to Human resource -> Setup -> Human resource workflows
Click on new workflow button and select your custom workflow type then click on create  workflow button
Note: Before designing new workflow. Execute incremental CIL.


Step 14) Define start and end states of workflow.
For this you need to go through below mentioned steps
- Drag your approval elements from Toolbox on the left of designer.
- Connect the bottom of start state with top of approval element.
- Connect the bottom of approval elements with top of the end state.
- Resolve issue : For instance you may require to add step. For this double click on approval element. It will navigate you to step screen. Now right click on step and open its properties add assignments, workflow item subject and work flow item instructions if required.
- Activate your workflow


Step 15) Go to your list page form and you will see your workflow bar there.


Tuesday, 18 September 2018

Export modified artifacts XPO /Backup in AX 2012

Today, I will be discussing about the way through which we can export modified artifacts at the end of the day. On basis of your filters system will be able to auto identify all modified artifacts and  add them in your project. You may add different filters for this process for instance Modified user or Date. We can say that its is  sort of day end backup process.

Step 1 ) Create a private project. For this open your dev environment and press Ctrl+Shift+P.


Step 2) Right click on private projects and create a new project. Name the project as per your requirements.


Step 3) Select Advance Project Filters.


Step 4) Select AOT option from Grouping section and click on select button it will open filters.


Step 5) Now add a filter of  Modified date. I will be adding today date value in it. And click ok button


Step 6) All modified artifacts in today's date will be added into your project. Now you can export your project and keep as backup on your drive. For export right click on project and select export option and your xpo will be exported on selected path.

Wednesday, 5 September 2018

Debug your code in D365FO - Part 2


As we already discussed about the first technique of debugging X++ code. Now lets proceed further on with second technique where we will be debugging code by attaching the process in Visual Studio.

Note : I have created a simple list form for demo purpose and have overridden its Init method. Piece of code has been written in its init method and that code will be debugged.

To debug  X++ code with attach process technique, following are  steps. 

Step1 ) Open Visual Studio as Administrator and X++ code for debugging.

Step 2)  Go to AOT in Application Explorer and search your artifact. In my case I have artifact with name 'DemoForm' .


Step 3) For demo purpose I have overridden its init method.


Step 4) Insert a breakpoint  on info code line by pressing F9 and click on Debug menu and select Attach to process option.


Step 5) Now select w3wp.exe process and click on attach button.

Note : Show processes for all users checkbox must be tick.

Step 6) Wait till all symbols are loaded and breakpoint dot color changed to red color.
Note : In case if you face any issue for instance yours symbols are not loaded properly then you may need to restart visual studio and build your project/solution.


Step 7) Now run your form from front end and you will be able to debug your code.


Debug your code in D365FO Part-1

This post will be about how to debug your code in D365FO. As we all know that Visual studio will be used for coding in D365. So here no more requirement of Dynamics AX Debugger instead of this we will be using debugger of  Visual Studio.

There are two ways through which you can debug X++  code in Microsoft Visual Studio.
  • Debug X++ code by setting as Startup object
  • Debug X++ code by attaching it with the process
In part-1 I will be discussing about the first technique in which debugging will be performed by setting as Startup object.
To debug  X++ code with startup object technique , following are the steps.

Step1 ) Open the X++ code in Visual Studio to debug

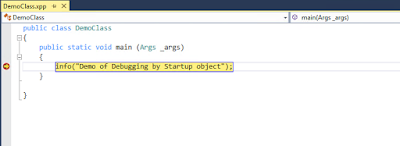
Step 2) Find the line or lines where you want to debug and set a breakpoints on those lines. In order to set a break point go to the line and press F9 or left click and go to breakpoint and select insert a break point. You will see a red dot which indicates that break point has been added.


Step 3) Now right click on project and go to its properties and set your class as Startup object.


Step 4) On debug menu , select start debugging


Step 5) Wait, till symbols are loaded and your debugging will be started.

Note: If your breakpoint does not hit then you might need to rebuild model and restart visual studio.


Custom Business events Part 3 - (Activate custom business event) in D365 F&O

 In this blog we will discuss about the steps to activate a custom business in D365 F&O. As we know that business event catalog does not...