Today, I will be discussing about how to move customization or elements from one layer to another.
Let's say we have a scenario in which we want to move element from usr layer to var.
Following steps are required for moving elements to another.
Step 1) Go to AOT and select the element you want to export. For this purpose right click on it and select export option. Save your exported element on desired path.
Step 2) Use the AOT and delete the element from the layer you don't want further more.
Note : When you delete a table, all data in the table and ID references will be lost.
Step 3) Close Dynamics AX client.
Step 4) Open the Dynamics AX on the layer where you want to move elements. For setting layer use this link : Set the layer .
Step 5) Import the elements from xpo on your desired layer where you want to move.
Saturday, 6 October 2018

Create custom workflow participant assignment provider type in AX 2012
In Dynamics AX, workflow provider is used to provider specific information to workflow instance on runtime. Let's say we have a scenario in which an employee want to make a request for anything as per requirements and its requires approval from its department manager/head. In this case workflow provider type participant assignment will be created.
Participant assignment provider type : It is used for resolving a logical role into one or more users ids. For example. this provider is used to resolve a Microsoft Dynamics AX security role into the users assigned to that role.
Following steps are required for creating custom workflow participant assignment provider type.
Step 1) Create a new class and it will implement workflow participant provider interface.

Step 2) Add a new method and enter following code for the getParticipantTokens method of interface. It will be used for defining user groups. In my case its department Manager. Tokens add method accepts first parameter of participant workflow token id and second participant workflow token name.


Participant assignment provider type : It is used for resolving a logical role into one or more users ids. For example. this provider is used to resolve a Microsoft Dynamics AX security role into the users assigned to that role.
Following steps are required for creating custom workflow participant assignment provider type.
Step 1) Create a new class and it will implement workflow participant provider interface.

Step 2) Add a new method and enter following code for the getParticipantTokens method of interface. It will be used for defining user groups. In my case its department Manager. Tokens add method accepts first parameter of participant workflow token id and second participant workflow token name.

Step 3) Add another method and enter following code for the resolve method. This method will be used for adding users to user list . For demo purpose i have added Admin user to user list and it will be returned on runtime and will be send to this user for approval purpose. You may add users as per your requirements.

Step 4) Add below code for construct method.

Step 5) Create new custom participant assignment provider. For this purpose go to AOT and expand its workflow node. Now go to providers node then participant assignment node. Now right click on it and add new participant assignment provider.

Step 6) Set following properties on it.
- Name : The name of the custom provider
- Label : The label of the custom provider
- HelpText : A description for the custom provider
- Association type : Specify whether workflow provider is used at company or global level.
- AvailableForAllWorkflowTypes : Specify whether workflow provider will be used for all workflow types.
- ProviderClass : Workflow provider class which will be used for specifying the behavior of custom provider. We have created that class provider earlier .

Step 7) Expand newly created workflow provider node and right click on workflow type and add new workflow type. Set your required workflow type on its properties.


Step 8) You may verify your provider on workflow configuration. Go to workflow designer and go on its step part. Check assignment properties and you will see newly created of type of participant and it will have participant as Department Manager. Remember that Department Manager was add as token in getParticipantTokens method of class.

Friday, 5 October 2018
Create custom lookup for a Data set field
Today, I will be discussing about how to create a lookup for a data set field. In enterprise portal the TitleField1 and TitleField2 properties are used as the default content for a lookup. However you can use the datasetLookup() method in the field of data source of data set in order to set the content for lookup.
Step 1) Go to your data set and expand its data source. Now add a method for dataSetLookup().

Step 3) Add code in dataSetLookup() method. In my case i need to show list of all employees which belong to selected department. I am showing here only personnel number of employee.

Step 4) Below is the configured lookup displaying personnel numbers.

Step 1) Go to your data set and expand its data source. Now add a method for dataSetLookup().

Step 3) Add code in dataSetLookup() method. In my case i need to show list of all employees which belong to selected department. I am showing here only personnel number of employee.

Step 4) Below is the configured lookup displaying personnel numbers.

Thursday, 4 October 2018
Debug X++ code of workflow in AX 2012
Today I will discussing about how to debug X++ code of workflow in AX 2012. As we all know that workflow submission code is native X++ and its event handler code is compiled into CIL.
Here is the method through which we can debug its code for instance submit manager or event handlers code etc.
Note : Before starting the process of debugging you have to make sure that debugging is enabled for the server. For this purpose open Microsoft Dynamics AX Server Configuration utility as administrator then create or check existing configuration. On Application object server tab you need to mark Enable breakpoints to debug code running on this server check box.
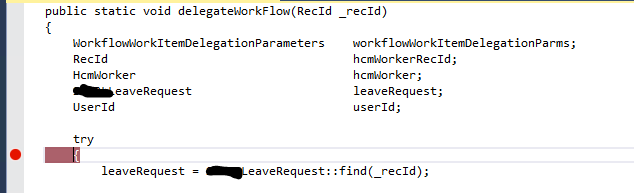
For development work space - Set breakpoints in the X++ code by using Code Editor.
Step 1) Start Visual Studio as administrator.
Step 2) Go to view menu and click on Application explorer. It will open the AOT artifacts.

Step 3) In the classes node of Application explorer, go to your classes and expand it. You will see different methods of that code. Now double click on method that you want to debug or right click on method and select view code option it will open your code in designer.

Step 4) Insert a break point on the line of code you want to debug. For this press F9 or right click on the line then go to break point and select insert break point option.
Step 5) Go to Debug menu and click on Attach to process option.

Step 6) Select AX32Serv.exe option from the Attach process screen and click on Attach button. Make sure show processes for all users option is checked.

Step 7) Symbols will be loaded and break point will be be enabled. When you will start submission of your workflow it will hit on the line code to whom you have set for debugging.

Here is the method through which we can debug its code for instance submit manager or event handlers code etc.
Note : Before starting the process of debugging you have to make sure that debugging is enabled for the server. For this purpose open Microsoft Dynamics AX Server Configuration utility as administrator then create or check existing configuration. On Application object server tab you need to mark Enable breakpoints to debug code running on this server check box.
For development work space - Set breakpoints in the X++ code by using Code Editor.
Step 1) Start Visual Studio as administrator.
Step 2) Go to view menu and click on Application explorer. It will open the AOT artifacts.

Step 3) In the classes node of Application explorer, go to your classes and expand it. You will see different methods of that code. Now double click on method that you want to debug or right click on method and select view code option it will open your code in designer.

Step 4) Insert a break point on the line of code you want to debug. For this press F9 or right click on the line then go to break point and select insert break point option.
Step 5) Go to Debug menu and click on Attach to process option.

Step 6) Select AX32Serv.exe option from the Attach process screen and click on Attach button. Make sure show processes for all users option is checked.

Step 7) Symbols will be loaded and break point will be be enabled. When you will start submission of your workflow it will hit on the line code to whom you have set for debugging.
Tuesday, 2 October 2018
Compile X++ code using AXBuild or Command Prompt
Today, I will be discussing about how to compile your X++ code using cmd prompt. The AXBuild.exe will be doing compile for all X++ code, p-code and you will see its much faster than traditional compile method using MorphX client menu. This exe runs on AOS (Application Object Server) tier at a cmd.exe command prompt.
The utility program only involves compilation of p-code and it won't go further for compilation of .NET framework CIL.
Note : You should stop your AOS service before you start compilation.
Step 1) Open command prompt as a administrator. Navigate it to this path by using command.
cd C:\Program Files\Microsoft Dynamics AX\60\Server\"Your AOS name"\bin
It will navigate to given path.

Step 2) Input AXbuild command, execute it and wait till it completes.
Command : axbuild.exe xppcompileall /workers=6 /aos=01 /altbin="C:\Program Files (x86)\Microsoft Dynamics AX\60\Client\Bin"

Tip : For finding your AOS instance number search in windows : Microsoft Dynamics AX Server Configuration and go to Application Object Server tab and check AOS instance field. Highlighted part is the value of AOS instance number.

The utility program only involves compilation of p-code and it won't go further for compilation of .NET framework CIL.
Note : You should stop your AOS service before you start compilation.
Step 1) Open command prompt as a administrator. Navigate it to this path by using command.
cd C:\Program Files\Microsoft Dynamics AX\60\Server\"Your AOS name"\bin
It will navigate to given path.

Step 2) Input AXbuild command, execute it and wait till it completes.
Command : axbuild.exe xppcompileall /workers=6 /aos=01 /altbin="C:\Program Files (x86)\Microsoft Dynamics AX\60\Client\Bin"
- Workers = 6 : It tells about number of parallel or concurrent AOS workers for the compilation adn build processes. In my case they are 6.
- AOS = 1 : Instance server number
- Altbin = It tells about the path to the folder on the local AOS host computer that has the DLL files which are installed with an AX32.exe client .
After complete execute log file will be generated in html and its path will be given on cmd.

Tip : For finding your AOS instance number search in windows : Microsoft Dynamics AX Server Configuration and go to Application Object Server tab and check AOS instance field. Highlighted part is the value of AOS instance number.

Monday, 1 October 2018
Debug your batch job in D365FO
Today, I will be discussing about how to debug a batch job in D365FO. The process of debugging is bit easier in D365FO then compared to AX 2012.
All others steps are same with attach to process technique. Just need to select another process at a time of attachment.
1) Go to debug menu and select attach to process option.

2) Select the batch.exe process and make sure show processes for all users is selected.

After attaching the process symbols will be loaded. When you will execute your batch job at that time you will be able to debug X++ code.
All others steps are same with attach to process technique. Just need to select another process at a time of attachment.
1) Go to debug menu and select attach to process option.
2) Select the batch.exe process and make sure show processes for all users is selected.
Note : Batch Service has name batch.exe and its location is (C:\CustomerServiceUnit\DOBind\Packages\Cloud\AosWebApplication\
AosWebApplication.csx\roles\AosWeb\approot\bin ) –at least on locally deployed machines
AosWebApplication.csx\roles\AosWeb\approot\bin ) –at least on locally deployed machines

After attaching the process symbols will be loaded. When you will execute your batch job at that time you will be able to debug X++ code.
Create new config file for specific layer in AX 2012
Today I will be discussing about how to create a new config file for specific layer in AX.
Following steps are required for creation of new config file.
Step 1) Search Microsoft Dynamics AX 2012 Configuration in windows and run it as administrator. It will open Microsoft Dynamics Configuration Utility.
Step 2) Right click on Manage button and select create configuration option.

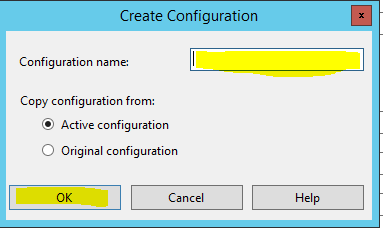
Step 3) Now enter your config name here and click on ok button. Your new config file will be created.
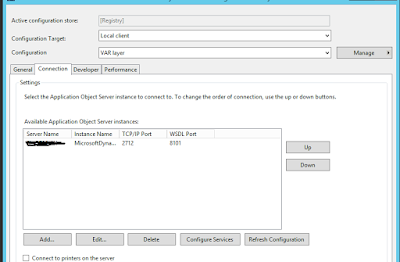
Step 4) Go to connection tab .


Step 5) Go to Developer tab. Here you will be able to select your layer. In my case its var layer.

Step 6) Go to connection tab and click on refresh button in order to update configuration.
 Step 7) Click on Manager and select export configuration file option. You will be able to save your config file on desired path. Now you can use your newly created config file.

Following steps are required for creation of new config file.
Step 1) Search Microsoft Dynamics AX 2012 Configuration in windows and run it as administrator. It will open Microsoft Dynamics Configuration Utility.
Step 2) Right click on Manage button and select create configuration option.

Step 3) Now enter your config name here and click on ok button. Your new config file will be created.

Step 4) Go to connection tab .
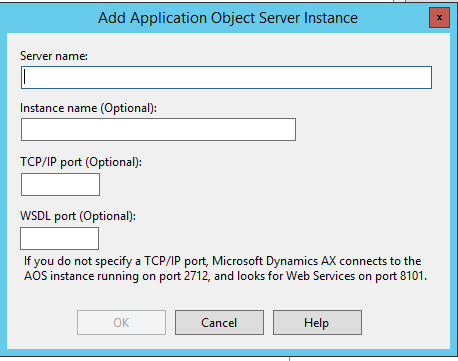
- Select add button if no aos server name is given and provide all details.
- If you want to verify AOS server name information then go to edit button and click it.

Step 5) Go to Developer tab. Here you will be able to select your layer. In my case its var layer.

Step 6) Go to connection tab and click on refresh button in order to update configuration.


Subscribe to:
Posts (Atom)
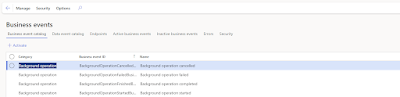
Custom Business events Part 3 - (Activate custom business event) in D365 F&O
In this blog we will discuss about the steps to activate a custom business in D365 F&O. As we know that business event catalog does not...
-
 Today, i will be discussing about one of the common issue of expired certification on development machine. You guys must have observed one o...
 -
 Today, I will share the list of blogs which give the understanding of how to connect azure blob storage with Dynamics 365 for finance and op...
 -
 Today, I will share another part of connecting azure blob storage with Dynamics 365 for finance and operations series. This part will be abo...