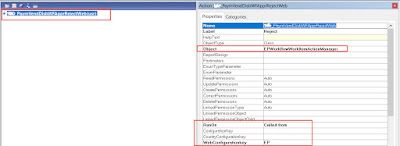
- Workflow category : LedgerJournalWFApprovalVendor
- Workflow type : VendDisbursementTemplate
- Workflow approval : VendDisbursementApproval
- Menu items
- Document Menu Item : LedgerJournalTable5
- Resubmit Menu Item : PaymVendDisbWFApprResubmitToWF
- Delegate Menu Item : PaymVendDisbWFApprDelegate
- SubmitToWorkflow MenuItem : PaymVendDisbWFApprSubmitToWF
- Cancel MenuItem : PaymVendDisbWFApprCancel
- Classes
- LedgerJournalWFApprEventHandlerWF
- LedgerJournalWFApprEventHandlerElem
As we all can see that each menu item has been attached in workflow type for client only and no web menu item has been introduced for Enterprise portal. So, we need to perform some customization for enabling workflow on payment journal on both sides (AX client and enterprise portal).
Moving a head you must have noted that there is no ledger journal table form available in Enterprise portal. Standard LedgerJournalTable form is not associated with any template so its deployment to EP is not possible. Since our requirement is very limited so we are not going to create a similar ledger journal table form in Enterprise portal instead of this we will create a simple form with list page template by showing limited number of fields in it. This is simple work around for achieving our target.
Following elements are required to be created.
- Web Menu Item (Actions)
- Web menu item for approval action
- Web menu item for reject action
- Web menu item for delegate action
- Create a form with list page template which will show all vendor payment journals and deploy it to EP so that its web URL menu item will be created automatically.
Step 1) Create a simple query and add LedgerJournalTable as a data source. Add a range for journal type field with value Vendor Disbursement.
Step 2) Create a form with list page template and add a query into it. Enable workflow on it by using its design properties.
Step 3) Create a display menu and attach your form with it.
Step 4) Deploy newly create menu item to EP and it will automatically create a web URL menu item. For this purpose right click on display menu item and select deploy to EP option.
Step 5) Create following web menu items for approval, delegation and rejection.
Step 6) Attach web menu items with workflow type and work flow approval.
Step 8) Compile and run Full CIL in order to check impacts.
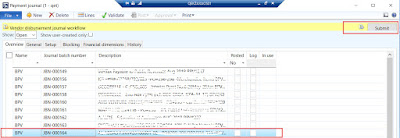
Final output :
Don't forget to configure vendor disbursement workflow in account payable workflows and activate it.


No comments:
Post a Comment
Note: only a member of this blog may post a comment.