Showing posts with label Azure portal. Show all posts

Wednesday, 1 May 2024

Custom Business events Part 1 - (Setup end point) in D365 F&O

In this blog we will discuss about the setup of end point  in D365 F&O.

Before jumping into the process of set up. I want to add on some information regarding business events.

What are business events?

The business event in D365 F&O is way through which external system receives messages from D365 Finance and Operations.

Let's take a example :

We have a external system who want to know when the process of creating lines within trade agreements is completed. Then D365 F&O should send some notification or information  to the external system.

 In order to meet with business requirement we will need business event which will be triggered once the process is completed in D365 F&O. For this purpose we are planning to create a custom business event which will be triggered after completing certain operations. This trigger is sort of notification for the third party that the process has been completed. 

Later on the triggered will be consumed by logic app in order to send notification or information to third party.

Before jumping to code for creating custom business event.

We need to setup a end point in D365 F&O.

Below are the steps to setup the end point in D365 F&O.

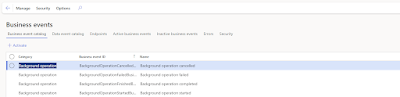
1) Go the System administration > Setup > Business evens > Business events catalog.

2) Click on the end points tab and +New button.


3) A new dialog box will open with the name of configure end point. Select Azure Service Bus Topic from the drop down of the endpoint type field and click Next button in the bottom.


4) Another form with new fields will be displayed where we need to fill in the following mandatory fields.
Once all field are completed then click ok button.
  • Endpoint : Define a name for the end point.
  • Azure active directory application id : You need to go to the portal.azure.com. Go to azure active directory > the App registration > Select app which is using D365 instance. Open the app and select the value appearing next to Application client id. Paste the same value in the Azure active directory application id.
  • Azure application secret : We need here the client secret id of the azure app registration record which was created earlier.
  • Key Vault DNS Name : We need a azure key vault name in the DNS name.
  • Key Vault Secret name : We need here the secrete  of the  azure key vault which is used in the field of the key vault dns name. This information will be fetched from the azure portal in the resource section against available key vault.

Topic name field is option but it is good to give some value.


5) Once the process is completed then the business event end point will appear in the end point tab.


Wednesday, 22 February 2023

Connect and upload in azure blob with azure key vault using x++

 Today, I will be sharing details about file upload in azure blob using azure vault that includes pre requisite and code snippet used to it.

Before proceeding with code we need following key information which will be added in the key vault parameters in D365 F&O.

  1. Azure application id
  2. Azure application client secret
  3. Key vault URL
  4. Key vault Secret (In our case we need three : Container name, storage account, storage key)
  5. Container/Blob must be created in the azure

The above mentioned information can be added and fetched from azure portal. After getting those details  you need to create a new record in azure vault parameters form.

Go to System administration > Setup > Key vault parameters

Create a new record in key vault then create three new records for secrets.


Below is the code snippet used to get storage account, storage key and container name via Azure vault and upload files in the blob.

Note: I have created csv file using CommaStreamIo and getting the stream from it in such a way
System.IO.Stream stream = commaStreamIo.getStream();
Also, add following namespace at the top of the class :
using Microsoft.Azure;
using Microsoft.WindowsAzure.Storage;
using Microsoft.WindowsAzure.Storage.Blob;
using Microsoft.WindowsAzure.Storage.Blob.CloudBlobContainer;
using Microsoft.WindowsAzure.Storage.Blob.CloudBlockBlob;
using Microsoft.WindowsAzure.Storage.File

Code snippet : 
 private void uploadFileInAzureBlob(System.IO.Stream _stream, str _fileName)
    {
      
        KeyVaultCertificateTable    certTableForContainer;
        KeyVaultCertificateTable    certTableForStorageAccount;
        KeyVaultCertificateTable    certTableForStorageAccountKey;
        str                         containerName;
        str                         storageAccountName;
        str                         storageAccountKey;
        
        certTableForContainer         = KeyVaultCertificateTable::findByName("ContainerName");
        certTableForStorageAccount    = KeyVaultCertificateTable::findByName("StorageAccountName");
        certTableForStorageAccountKey = KeyVaultCertificateTable::findByName("StorageAccountKey");

        try
        {
            if (certTableForStorageAccount.RecId != 0 && certTableForStorageAccountKey.RecId != 0 &&  certTableForContainer.RecId != 0)
            {
                containerName        = KeyVaultCertificateHelper::getManualSecretValue(certTableForContainer.RecId);
                storageAccountName   = KeyVaultCertificateHelper::getManualSecretValue(certTableForStorageAccount.RecId);
                storageAccountkey    = KeyVaultCertificateHelper::getManualSecretValue(certTableForStorageAccountKey.RecId);

                var storageCredentials = new Microsoft.WindowsAzure.Storage.Auth.StorageCredentials(StorageAccountName, storageAccountkey);
                CloudStorageAccount storageAccount = new Microsoft.WindowsAzure.Storage.CloudStorageAccount(storageCredentials, true);

                if(storageAccount)
                {
                    CloudBlobClient blobClient = storageAccount.CreateCloudBlobClient();
                    CloudBlobContainer blobContainer = blobClient.GetContainerReference(containerName);
                    changecompany(curExt())
                    {
                        CloudBlockBlob blockblob =    blobContainer.GetBlockBlobReference(_fileName);
                        if(blockblob && !blockblob.Exists(null, null))
                        {
                            if(_stream)
                            {
                                _stream.Position = 0;
                                System.IO.StreamReader reader = new System.IO.StreamReader(_stream);
                                str csvFileContent = reader.ReadToEnd();
            
                                blockblob.UploadText(csvFileContent,null,null,null,null);
                                blockBlob.FetchAttributes(null,null,null);
                                BlobProperties BlobProperties = blockblob.Properties;

                                if(BlobProperties.Length == _stream.Length)
                                {
                                    info(strFmt("File %1 uploaded successfully", _fileName));
                                }
                            }
                        }
                        else
                        {
                            error(strFmt("File %1 Already Exists",_fileName));
                        }
                    }
                }
                else
                {
                    error("Unable ToConnect With Storage Account");
                }
            }
            else
            {
                info("Storage Account Or Key Record Missing");
            
            }

           
        }
        catch(Exception::Error)
        {
            error("Operation Cannot Be Completed");
        }

}

Custom Business events Part 3 - (Activate custom business event) in D365 F&O

 In this blog we will discuss about the steps to activate a custom business in D365 F&O. As we know that business event catalog does not...