Showing posts with label Dynamics 365 for Finance and Operations. Show all posts

Wednesday, 1 May 2024

Custom Business events Part 3 - (Activate custom business event) in D365 F&O

 In this blog we will discuss about the steps to activate a custom business in D365 F&O.

As we know that business event catalog does not get automatically refreshed. So, we need to do that step manually.

1) Go the System administration > Setup > Business evens > Business events catalog.


2) Click on Manage > Rebuild business event catalog


3) Once the process is completed then you will be able to see info message on the screen.


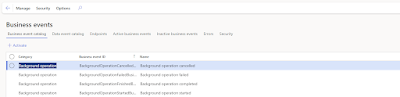
4) You may search the custom business event in the business event catalog  tab.


5) Select the relevant custom business event and click on Activate button.

6) A new form with name configure new business event will appear. Select the  relevant legal entity and endpoint name which was created earlier and click Ok button.


7) Once it is activated. The custom business event will appear in the Active events tab.


Custom Business events Part 1 - (Setup end point) in D365 F&O

In this blog we will discuss about the setup of end point  in D365 F&O.

Before jumping into the process of set up. I want to add on some information regarding business events.

What are business events?

The business event in D365 F&O is way through which external system receives messages from D365 Finance and Operations.

Let's take a example :

We have a external system who want to know when the process of creating lines within trade agreements is completed. Then D365 F&O should send some notification or information  to the external system.

 In order to meet with business requirement we will need business event which will be triggered once the process is completed in D365 F&O. For this purpose we are planning to create a custom business event which will be triggered after completing certain operations. This trigger is sort of notification for the third party that the process has been completed. 

Later on the triggered will be consumed by logic app in order to send notification or information to third party.

Before jumping to code for creating custom business event.

We need to setup a end point in D365 F&O.

Below are the steps to setup the end point in D365 F&O.

1) Go the System administration > Setup > Business evens > Business events catalog.

2) Click on the end points tab and +New button.


3) A new dialog box will open with the name of configure end point. Select Azure Service Bus Topic from the drop down of the endpoint type field and click Next button in the bottom.


4) Another form with new fields will be displayed where we need to fill in the following mandatory fields.
Once all field are completed then click ok button.
  • Endpoint : Define a name for the end point.
  • Azure active directory application id : You need to go to the portal.azure.com. Go to azure active directory > the App registration > Select app which is using D365 instance. Open the app and select the value appearing next to Application client id. Paste the same value in the Azure active directory application id.
  • Azure application secret : We need here the client secret id of the azure app registration record which was created earlier.
  • Key Vault DNS Name : We need a azure key vault name in the DNS name.
  • Key Vault Secret name : We need here the secrete  of the  azure key vault which is used in the field of the key vault dns name. This information will be fetched from the azure portal in the resource section against available key vault.

Topic name field is option but it is good to give some value.


5) Once the process is completed then the business event end point will appear in the end point tab.


Wednesday, 22 February 2023

Connect and upload in azure blob with azure key vault using x++

 Today, I will be sharing details about file upload in azure blob using azure vault that includes pre requisite and code snippet used to it.

Before proceeding with code we need following key information which will be added in the key vault parameters in D365 F&O.

  1. Azure application id
  2. Azure application client secret
  3. Key vault URL
  4. Key vault Secret (In our case we need three : Container name, storage account, storage key)
  5. Container/Blob must be created in the azure

The above mentioned information can be added and fetched from azure portal. After getting those details  you need to create a new record in azure vault parameters form.

Go to System administration > Setup > Key vault parameters

Create a new record in key vault then create three new records for secrets.


Below is the code snippet used to get storage account, storage key and container name via Azure vault and upload files in the blob.

Note: I have created csv file using CommaStreamIo and getting the stream from it in such a way
System.IO.Stream stream = commaStreamIo.getStream();
Also, add following namespace at the top of the class :
using Microsoft.Azure;
using Microsoft.WindowsAzure.Storage;
using Microsoft.WindowsAzure.Storage.Blob;
using Microsoft.WindowsAzure.Storage.Blob.CloudBlobContainer;
using Microsoft.WindowsAzure.Storage.Blob.CloudBlockBlob;
using Microsoft.WindowsAzure.Storage.File

Code snippet : 
 private void uploadFileInAzureBlob(System.IO.Stream _stream, str _fileName)
    {
      
        KeyVaultCertificateTable    certTableForContainer;
        KeyVaultCertificateTable    certTableForStorageAccount;
        KeyVaultCertificateTable    certTableForStorageAccountKey;
        str                         containerName;
        str                         storageAccountName;
        str                         storageAccountKey;
        
        certTableForContainer         = KeyVaultCertificateTable::findByName("ContainerName");
        certTableForStorageAccount    = KeyVaultCertificateTable::findByName("StorageAccountName");
        certTableForStorageAccountKey = KeyVaultCertificateTable::findByName("StorageAccountKey");

        try
        {
            if (certTableForStorageAccount.RecId != 0 && certTableForStorageAccountKey.RecId != 0 &&  certTableForContainer.RecId != 0)
            {
                containerName        = KeyVaultCertificateHelper::getManualSecretValue(certTableForContainer.RecId);
                storageAccountName   = KeyVaultCertificateHelper::getManualSecretValue(certTableForStorageAccount.RecId);
                storageAccountkey    = KeyVaultCertificateHelper::getManualSecretValue(certTableForStorageAccountKey.RecId);

                var storageCredentials = new Microsoft.WindowsAzure.Storage.Auth.StorageCredentials(StorageAccountName, storageAccountkey);
                CloudStorageAccount storageAccount = new Microsoft.WindowsAzure.Storage.CloudStorageAccount(storageCredentials, true);

                if(storageAccount)
                {
                    CloudBlobClient blobClient = storageAccount.CreateCloudBlobClient();
                    CloudBlobContainer blobContainer = blobClient.GetContainerReference(containerName);
                    changecompany(curExt())
                    {
                        CloudBlockBlob blockblob =    blobContainer.GetBlockBlobReference(_fileName);
                        if(blockblob && !blockblob.Exists(null, null))
                        {
                            if(_stream)
                            {
                                _stream.Position = 0;
                                System.IO.StreamReader reader = new System.IO.StreamReader(_stream);
                                str csvFileContent = reader.ReadToEnd();
            
                                blockblob.UploadText(csvFileContent,null,null,null,null);
                                blockBlob.FetchAttributes(null,null,null);
                                BlobProperties BlobProperties = blockblob.Properties;

                                if(BlobProperties.Length == _stream.Length)
                                {
                                    info(strFmt("File %1 uploaded successfully", _fileName));
                                }
                            }
                        }
                        else
                        {
                            error(strFmt("File %1 Already Exists",_fileName));
                        }
                    }
                }
                else
                {
                    error("Unable ToConnect With Storage Account");
                }
            }
            else
            {
                info("Storage Account Or Key Record Missing");
            
            }

           
        }
        catch(Exception::Error)
        {
            error("Operation Cannot Be Completed");
        }

}

Monday, 20 September 2021

Part 4 - Connect Azure BLOB storage with Dynamics 365 for Finance and Operations - (Place/Store/Upload the file in the blob folder using X++)

Today, I will share another part of connecting azure blob storage with Dynamics 365 for finance and operations series.

This part will be about placing or uploading the file in  the blob folder using X++ in Dynamics D365 Finance and Operations. Basically it is covering the write operations to the blob storage.

Perquisite:

  1. Storage account
  2. Blob container
  3. Create 2 folders in the blob container


Create a new class in the Dynamics 365 finance and operations and add following methods in it.
  • connectToAzureBlob
  • uploadFileToAzureBlob
  • moveTheFileBetweenFolders
  • deleteTheFileFromFolder
And we will be using following .NET libraries.
  • using Microsoft.WindowsAzure.Storage;
  • using Micorosft.WindowsAzure.Storage.Blob;
  • using System.IO;
  • using System.Text;
  • using System.Text.ASCIIEncoding;


Output:

1) Uploaded or creating new file in azure blob


2) Moved file to another folder


3) Deleted the file from folder


Part 3 - Connect Azure BLOB storage with Dynamics 365 for Finance and Operations - (Consume or Read file details or data from the blob folder using X++)

Today, I will share another part of connecting azure blob storage with Dynamics 365 for finance and operations series.

This part will be about Consuming or Reading file details or data from the blob folder using X++ in Dynamics D365 Finance and Operations.

Perquisite:

  1. Storage account
  2. Blob container
  3. Create folder in the blob container
  4. Add a file to the blob container for testing (Using the Upload option in the Azure portal)

Sample text file


Create a new class in the Dynamics 365 finance and operations and add following methods in it.
  • connectToAzureBlob
  • GetFileNameList
  • readFileValueFromMemoryStream
And we will be using following .NET libraries.
  • using Microsoft.WindowsAzure.Storage;
  • using Micorosft.WindowsAzure.Storage.Blob;
  • using System.IO;
Sample code for the classes:


Output :  


Part 2 - Connect Azure BLOB storage with Dynamics 365 for Finance and Operations - (Establish connection between Azure BLOB and D365 F&O)

Today, I will share another part of connecting azure blob storage with Dynamics 365 for finance and operations series.

This part will be about establishing the connection between azure blob and D365 F&O.

Perquisite:

  1. Storage account
  2. Blob container
1- Storage account

The application will require to access the connection string at runtime in order to authorize requests made to Azure Storage. We will use the connection string in Dynamics 365 Finance and Operations environment variable. (That variable can be part of parameters on the form)

The format of the connection string is :

DefaultEndpointsProtocol = [http|https];AccountName=myAccountName;AccountKey=myAccountKey

  • HTTP or HTTPS (Whether you want to connect to either of one protocol)
  • myAccountName : Replace it with your storage account
  • myAccountKey : Replace with your account access key
You can find out the connection key value on this path in the Azure portal.
- Go to Storage account - Access keys 


2- Blob Account


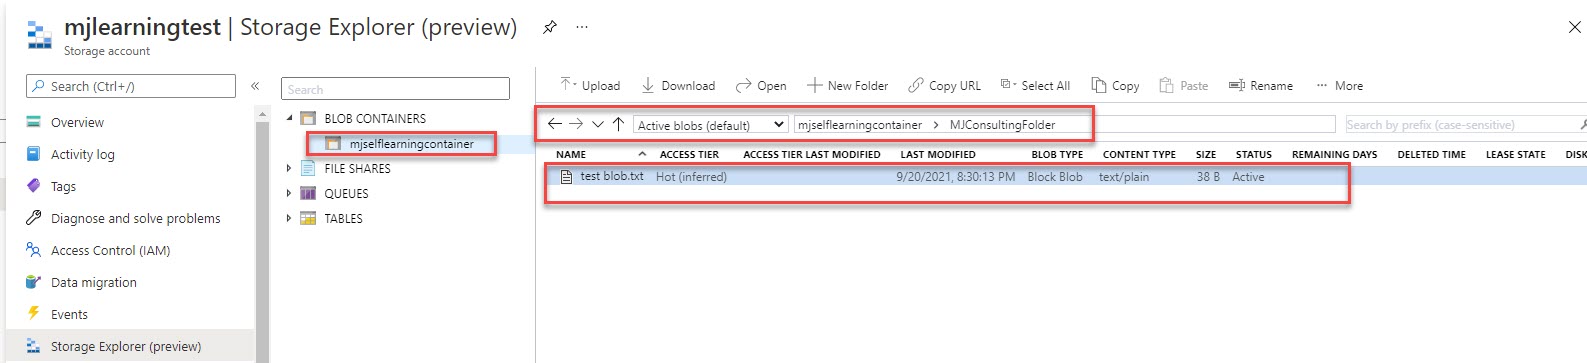
- Go to Storage account > Storage Explorer (preview) > BLOB CONTAINER


3- Store the BLOB file path in the Dynamics 365 Finance and Operations

Blob container has a folder type structure and files will be accessed from certain path.
We will store the file path and store it in the Dynamics 365 F&O variable to access the file at the particular location. With the help of file path we can iterate the blob container to particular folder and access the files.

Steps to create folder in blob container.
  • Go to Storage account > Storage Explorer (preview) > BLOB CONTAINER
  • Click New Folder and enter the name
  • Click OK


4- Create a new class and a code in it.(It will establish connection between Azure blob and D365 F&O)

We will use two .NET libraries to use Azure blob.
  • using Microsoft.WindowsAzure.Storage;
  • using Micorosft.WindowsAzure.Storage.Blob;


Output:


Part 1 - Connect Azure BLOB storage with Dynamics 365 for Finance and Operations - (Create Storage account and container in it)

Today, I will share the list of blogs which give the understanding of how to connect azure blob storage with Dynamics 365 for finance and operations and how to perform different operations on it.

Consider one of the common scenario where to need to exchange files between different applications such file can be created by D365 for finance and operations and third party app. As we all know that D365 does not provide accessibility to local path for Dynamics Production URL so we need to rely on another source.

The best and convenient way will be to handle situation using Microsoft Azure BLOB storage as central repository to exchange files between external system.

Part 1 - Create Azure BLOB and establish connection with Dynamics 365 for finance and operations

Perquisite:

  • Need Azure subscription to access Azure storage and can be used by creating a free account here .
    • Create a free account on Azure portal.
    • Sign into the Azure portal.
1) Go to Storage account by click home icon and click on it to open storage accounts page.


2) Create Create button.

3) Enter the information for storage account and click Review+Create button.

4) Click Create (once validation is passed) as it will deploy the storage account.


5) Go back to the storage accounts menu and check the newly created storage accounts. 

6) Click the Storage account and go the access keys. Click the show keys to view the details of keys.
Note : Key 1 and Key 2 are basically the connections strings which will be used to access this storage account.
7) Go to the container and click the Container icon to create new one.
8) Enter the name and click Create.
 
Output : Newly created container.


Monday, 24 February 2020

Dynamics 365 F&O - Changes in financial dimension structure methods as compared to AX 2012

Today , I will be discussing about the changes of methods which are commonly used for financial dimension or ledger dimension development using X++.
There are number of methods which have been moved from DimStorage class to other classes in D365 F&O.
Here is the list of those methods.


Thursday, 9 January 2020

Unable to find w3wp process for debugging in Visual studio

Today, I will be discussing about one of the common issue which i faced while attaching the process for debugging in visual studio for D365 F&O project.

I was quite usual that i was unable to find out w3wp.exe process on Attach process screen in visual studio for debugging. Even though VS was running as administrator and i have marked the check box of show all process.

So, this issue usually occurs because when you install  the visual studio then IIS express is the default web server for web applications projects. That's why you visual studio is not using local IIS for running local applications instead of this it is using IIS express.

Workaround for it : Attach iisexpress.exe process instead of w3wp.exe. 


Error : A reference to 'Dynamics.AX.SourceDocumentation' is required to compile this module.

Today I will be discussing about one of the common issue which you might face while building the custom model.

Below is the detail description of that issue:

A reference to 'Dynamics.AX.SourceDocumentation, Version=0.0.0.0, Culture=neutral, PublicKeyToken=null' is required to compile this module.

Root cause : One of reference module is missing from your custom model.

Solution : You need to update the model by using the model parameter wizard,. Go to Dynamics 365 -> Model management -> Update model parameters -> Select your model -> Check mark the  source documentation module as reference.


Tuesday, 10 December 2019

Add link/hyerlink through drillthrough on SSRS report in D365 F&O

Today I will discussing about one of the requirement which I came through while working on sales order confirmation report. 
The requirement was this that i need to add a hyperlink on Itemid field within existing sales order confirmation report. So here are couple of steps which any one can follow on in order to add a hyper link for itemid field within SSRS report.

Step 1) Open the design of your report. Right click on text box properties.


Step 2) Go to action tab and click the URL radio button and add a expression then Click on ok button.


Explanation of expression :
=Microsoft.Dynamics.Framework.Reports.BuiltInMethods.GenerateDrillThroughLink(
Parameters!AX_ReportContext.Value,
Parameters!AX_UserContext.Value,
"Menuitem name to be called",                    
"The type of the meun item which is to be called for instance : "Display"",
"Table name associated with Menu item or referred by it",
"Field name within the restricted table ",
"The value of field within dataset")

Output : 
When you will click on Item id field in SSRS report then it will navigate  you to release products form.


Wednesday, 8 May 2019

Get worker name against current user in D365 F&O

Today , I will be sharing a small code snippet which can be used to get worker which is attached with the current system user.

Here is the code snippet.

UserId currentUserId;
Name workerName;

currentUserId = curUserId();

if (currentUserId)
{
       workerName =  HcmWorker::findByPerson(DirPersonuser::find(currentUserId).PersonParty).name();

}

Note : curUserId() is system based method which can be used to get current user which is logged in right now.

Monday, 8 April 2019

Create batch job using SysOperationFramework

Today, I will discussing about how to create a batch job using SysOperationFramework in Dynamics 365 Finance And Operations.

Let's suppose we need  get all customer open transaction with negative amount whose payment method is null and update their fields on basis of some logic. Also, user will have option to select number of customers on run time.

In order to achieve our target we need create 3 new class.

1- Contract
2- Service
3- Controller

Step 1- Create a query in my case i have taken join between CustTrans and CustTransOpen tables and added ranges on AccountNum, AmountCur and PaymMode fields.


Step 2- Create a new Contract class and add query in it.


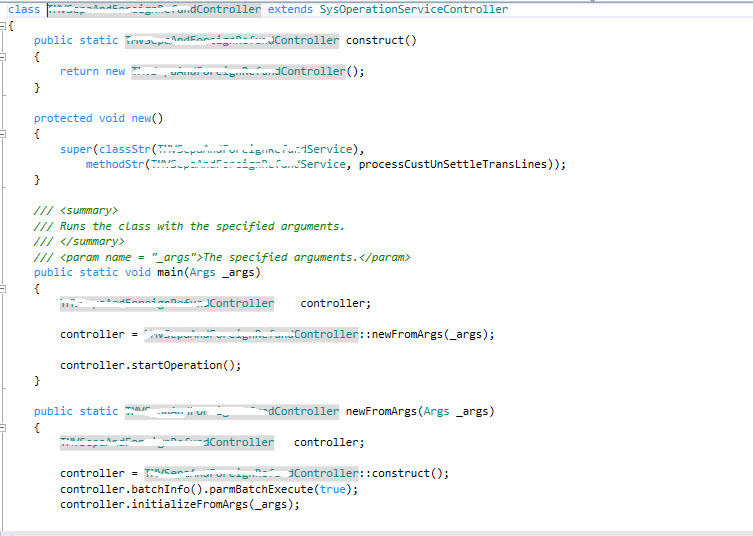
Step 3- Create a new Service class and add method in it for executing the logic and get query from data contract. Execute query by using QueryRun. Add some logic in executeMode method as per your requirement like in my case I need to update some records.


Step 4 - Create a new controller class.


Step - 5 Create a new action menu item and set the controller class name as object and set the
processing method name from service class in parameter field.


Step - 6 Final output of the batch job.


Custom Business events Part 3 - (Activate custom business event) in D365 F&O

 In this blog we will discuss about the steps to activate a custom business in D365 F&O. As we know that business event catalog does not...