Showing posts with label D365. Show all posts

Wednesday, 1 May 2024

Custom Business events Part 3 - (Activate custom business event) in D365 F&O

 In this blog we will discuss about the steps to activate a custom business in D365 F&O.

As we know that business event catalog does not get automatically refreshed. So, we need to do that step manually.

1) Go the System administration > Setup > Business evens > Business events catalog.


2) Click on Manage > Rebuild business event catalog


3) Once the process is completed then you will be able to see info message on the screen.


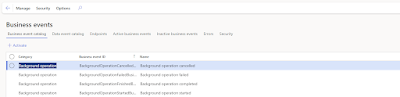
4) You may search the custom business event in the business event catalog  tab.


5) Select the relevant custom business event and click on Activate button.

6) A new form with name configure new business event will appear. Select the  relevant legal entity and endpoint name which was created earlier and click Ok button.


7) Once it is activated. The custom business event will appear in the Active events tab.


Custom Business events Part 2 - (Create custom business event via code) in D365 F&O

 In this blog we will discuss about the steps to create custom business event via code in D365 F&O.

As we have already discussed in our previous blog that we need a custom business event which will be used to send notification to third party. This trigger will be consumed by logic app to send the information or notification to the third party.

In order to create a custom business event we need to create following three class artifacts:

  • BusinessEventsContract class
  • BusinessEventBase class
  • A Trigger class to send the business event
Below are the code snippet to create above mentioned classes : 

1) Create BusinessEventsContract class

Business event contract class is used to define internal state, implement initialization method, static constructor and implement parm method to access the contract state.


2) Create BusinessEventBase class.

In order to create custom base we need to extend it from the business event base class. After extending we need to implement a private new method, methods to maintain internal state, static constructor method,  and buildContract method.


3) A Trigger class to send the business event

This class will be responsible to trigger the business event.


Monday, 20 September 2021

Part 2 - Connect Azure BLOB storage with Dynamics 365 for Finance and Operations - (Establish connection between Azure BLOB and D365 F&O)

Today, I will share another part of connecting azure blob storage with Dynamics 365 for finance and operations series.

This part will be about establishing the connection between azure blob and D365 F&O.

Perquisite:

  1. Storage account
  2. Blob container
1- Storage account

The application will require to access the connection string at runtime in order to authorize requests made to Azure Storage. We will use the connection string in Dynamics 365 Finance and Operations environment variable. (That variable can be part of parameters on the form)

The format of the connection string is :

DefaultEndpointsProtocol = [http|https];AccountName=myAccountName;AccountKey=myAccountKey

  • HTTP or HTTPS (Whether you want to connect to either of one protocol)
  • myAccountName : Replace it with your storage account
  • myAccountKey : Replace with your account access key
You can find out the connection key value on this path in the Azure portal.
- Go to Storage account - Access keys 


2- Blob Account


- Go to Storage account > Storage Explorer (preview) > BLOB CONTAINER


3- Store the BLOB file path in the Dynamics 365 Finance and Operations

Blob container has a folder type structure and files will be accessed from certain path.
We will store the file path and store it in the Dynamics 365 F&O variable to access the file at the particular location. With the help of file path we can iterate the blob container to particular folder and access the files.

Steps to create folder in blob container.
  • Go to Storage account > Storage Explorer (preview) > BLOB CONTAINER
  • Click New Folder and enter the name
  • Click OK


4- Create a new class and a code in it.(It will establish connection between Azure blob and D365 F&O)

We will use two .NET libraries to use Azure blob.
  • using Microsoft.WindowsAzure.Storage;
  • using Micorosft.WindowsAzure.Storage.Blob;


Output:


Tuesday, 14 September 2021

SQL Query to get security details (such as Security roles, duties and privileges)

 Today, I will sharing out the list of queries which can used to get the security details.

It will cover following combinations of data.

  • Security roles
  • Security roles to duties
  • Security roles with privileges
  • Security role and duty combination along with privileges
Following list of tables are used in it.
  • SECURITYROLES
  • SECURITYOBJECTCHILDREREFERENCES
  • SECURITYDUTY
  • SECURITYPRIVILEGE

-- Get the list  of all security roles 
Select Name as SecurityRoleName FROM SecurityRole;

-- Get the list of all security roles to duties
SELECT T2.Name as SecurityRole, T3.NAME as Duty 
FROM SECURITYOBJECTCHILDREREFERENCES T1 
JOIN SECURITYROLE T2 ON T1.IDENTIFIER = T2.AOTNAME 
JOIN SECURITYDUTY T3 ON T1.CHILDIDENTIFIER = T3.IDENTIFIER
WHERE T1.OBJECTTYPE = 0 AND T1.CHILDOBJECTTYPE = 1 ;

-- Get the ;ist of all security roles with privileges 
SELECT T2.Name as SecurityRole, T3.NAME as Privileges
FROM SECURITYOBJECTCHILDREREFERENCES T1 
JOIN SECURITYROLE T2 ON T1.IDENTIFIER = T2.AOTNAME 
JOIN SECURITYPRIVILEGE T3 ON T1.CHILDIDENTIFIER = T3.IDENTIFIER
WHERE T1.OBJECTTYPE = 0 AND T1.CHILDOBJECTTYPE = 2 ;


-- Get the list of all role-duty combination with privilege 
SELECT T2.Name as SecurityRole, T2.AOTNAME as RoleSystemName,  T3.NAME AS Duty, T3.IDENTIFIER as DutySystemName, T5.NAME as Privilege, T5.IDENTIFIER as PrivilegeSystemName
FROM SECURITYOBJECTCHILDREREFERENCES T1 
JOIN SECURITYROLE T2 ON T1.IDENTIFIER = T2.AOTNAME 
JOIN SECURITYDUTY T3 ON T1.CHILDIDENTIFIER = T3.IDENTIFIER
JOIN SECURITYOBJECTCHILDREREFERENCES T4 on T4.IDENTIFIER = T3.IDENTIFIER
JOIN SECURITYPRIVILEGE T5 on T4.CHILDIDENTIFIER = T5.IDENTIFIER
WHERE T1.OBJECTTYPE = 0 AND T1.CHILDOBJECTTYPE = 1 
AND T4.OBJECTTYPE = 1 AND T4.CHILDOBJECTTYPE = 2;

Monday, 24 February 2020

Dynamics 365 F&O - Changes in financial dimension structure methods as compared to AX 2012

Today , I will be discussing about the changes of methods which are commonly used for financial dimension or ledger dimension development using X++.
There are number of methods which have been moved from DimStorage class to other classes in D365 F&O.
Here is the list of those methods.


Thursday, 9 January 2020

Error : A reference to 'Dynamics.AX.SourceDocumentation' is required to compile this module.

Today I will be discussing about one of the common issue which you might face while building the custom model.

Below is the detail description of that issue:

A reference to 'Dynamics.AX.SourceDocumentation, Version=0.0.0.0, Culture=neutral, PublicKeyToken=null' is required to compile this module.

Root cause : One of reference module is missing from your custom model.

Solution : You need to update the model by using the model parameter wizard,. Go to Dynamics 365 -> Model management -> Update model parameters -> Select your model -> Check mark the  source documentation module as reference.


Tuesday, 10 December 2019

Add link/hyerlink through drillthrough on SSRS report in D365 F&O

Today I will discussing about one of the requirement which I came through while working on sales order confirmation report. 
The requirement was this that i need to add a hyperlink on Itemid field within existing sales order confirmation report. So here are couple of steps which any one can follow on in order to add a hyper link for itemid field within SSRS report.

Step 1) Open the design of your report. Right click on text box properties.


Step 2) Go to action tab and click the URL radio button and add a expression then Click on ok button.


Explanation of expression :
=Microsoft.Dynamics.Framework.Reports.BuiltInMethods.GenerateDrillThroughLink(
Parameters!AX_ReportContext.Value,
Parameters!AX_UserContext.Value,
"Menuitem name to be called",                    
"The type of the meun item which is to be called for instance : "Display"",
"Table name associated with Menu item or referred by it",
"Field name within the restricted table ",
"The value of field within dataset")

Output : 
When you will click on Item id field in SSRS report then it will navigate  you to release products form.


Wednesday, 8 May 2019

Get worker name against current user in D365 F&O

Today , I will be sharing a small code snippet which can be used to get worker which is attached with the current system user.

Here is the code snippet.

UserId currentUserId;
Name workerName;

currentUserId = curUserId();

if (currentUserId)
{
       workerName =  HcmWorker::findByPerson(DirPersonuser::find(currentUserId).PersonParty).name();

}

Note : curUserId() is system based method which can be used to get current user which is logged in right now.

Monday, 8 April 2019

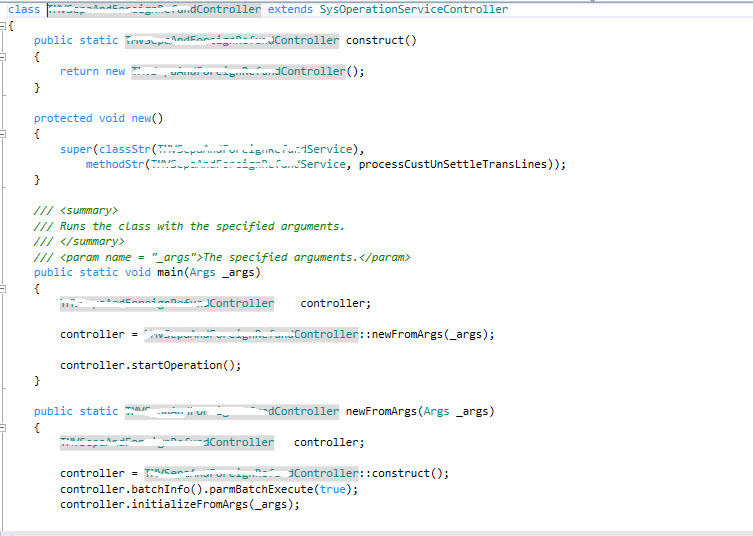
Create batch job using SysOperationFramework

Today, I will discussing about how to create a batch job using SysOperationFramework in Dynamics 365 Finance And Operations.

Let's suppose we need  get all customer open transaction with negative amount whose payment method is null and update their fields on basis of some logic. Also, user will have option to select number of customers on run time.

In order to achieve our target we need create 3 new class.

1- Contract
2- Service
3- Controller

Step 1- Create a query in my case i have taken join between CustTrans and CustTransOpen tables and added ranges on AccountNum, AmountCur and PaymMode fields.


Step 2- Create a new Contract class and add query in it.


Step 3- Create a new Service class and add method in it for executing the logic and get query from data contract. Execute query by using QueryRun. Add some logic in executeMode method as per your requirement like in my case I need to update some records.


Step 4 - Create a new controller class.


Step - 5 Create a new action menu item and set the controller class name as object and set the
processing method name from service class in parameter field.


Step - 6 Final output of the batch job.


Friday, 5 April 2019

Clear usage data in D365 Finance and Operations

Today I will be discussing about one of the common issue which you might have encountered at a time of executing batch job for second time.

For instance I was executing a job for first time and  have selected few parameter. At a code level I have set by default the value of batch job processing field to Yes.
However, before executing for second time I did modification in code and setting the batch processing field value to No . So now I was executing same batch job for second time but it batch processing field value was still Yes and due to this reason it was added in batch.

So, in order to reset or get latest code impact after build I need to reset usage data of that particular user.

Following are the steps required to reset usage data.

1- Open Chrome/IE browser.

2-  Click on setting in right most corner and select User options.


3- Click on Usage data button.


4-  Click on Reset button available in bottom. It will clear the usage data of specific or currently login user.


That's it and your usage data will be reset :)

D365 F&O - Open table in a browser (IE/Chrome)

Today, I will be discussing about two different approaches which can be used for opening tables in chrome/IE in order to view data.

First approach

1 - Go to visual studio.
2-  Right click on the table.


Note : Default company for table browser will be picked from its user which is set as administrator.

Second approach

1- Go to IE or Chrome.
2- Paste the following URL

https://<URL>/?mi=SysTableBrowser&prt=initial&cmp=<Company>&tablename=<TableName>&limitednav=true

Sample : https://ABC.cloudax.dynamics.com/?mi=SysTableBrowser&prt=initial&cmp=USMF&tablename=BankStatementTable&limitednav=true

Cmp             : It is company whose data you want to view.
TableName  : The name of table whom you want to browse.
URL              : https://ABC.cloudax.dynamics.com


Monday, 4 March 2019

Table browser - You are not authorized to login with your current credentials error in D365 F&O

Today, I will discussing about one of the common issue which you might have faced while opening table browser in D365 finance and operations. Eventhough you are logged in successfully as administrator and have full rights.

The error will be :
You are not authorized to login with your current credentials.


A quick work around for it.
Go to on following path : C:\AOSService\PackagesLocalDirectory\Bin
Here you will find a file DynamicsDevConfig.xml


Open this file as administrator in notepad. Here at the end you will find following line of code
<OfflineAuthenticationAdminEmail>test@domain.com</OfflineAuthenticationAdminEmail>

The email id which is associated with it is not authorized so replace it with your authorized email address and you will be able to access it.

Join multiples tables with same table using query build data source

Today, I will be discussing about one of the common issue related to query creation using  query build data source. 

Let's suppose we have following tables.
 - Leave Assignment  table - (Base Table) - Namely Parent for demo purpose
 - HcmEmployment table   - Namely Child 1 for demo purpose
 - Leave Plan table    - Namely Child 1 for demo purpose

We want to link base table with both hcm employment (child1) and leave plan table (child2)  using query build data source. Below is the code used for performing this operation.

public QueryRun   fetchMultipleTableQueryDemo()
{
    QueryBuildDataSource hcmEmploymentds;
    QueryBuildDataSource qbds;
    Query query = new Query();
       
    // Adding parent  as a datasource
    QueryBuildDataSource qbds = query.addDataSource(tableNum(Parent));

    // Adding child 1 as a datasource
    hcmEmploymentds= qbds.addDataSource(tableNum(Child1));
    hcmEmploymentds.joinMode(JoinMode::InnerJoin);
    hcmEmploymentds.addLink(fieldNum(Parent, Worker),fieldNum(Child1, Worker));
    hcmEmploymentds.fetchMode(QueryFetchMode::One2One);

   // Adding child 2 as a datasource
   qbds = qbds.addDataSource(tableNum(Child2));
   qbds.joinMode(JoinMode::InnerJoin);
   qbds.addLink(fieldNum(Parent, LeaveDetail), fieldNum(Child1, RecId));
   qbds.fetchmode(QueryFetchMode::One2One);
       
    return new QueryRun(query);
}

Friday, 25 January 2019

Create/Add dimension entry control by using dimension entry control sub pattern

Today, I will be discussing about how to create or add dimension entry control by using dimension entry control sub pattern.  As we all know that this subpattern is used when you have a group or tab page that uses DEC (Dimension Entry Control).

Let's begin with one example for demo purpose.

Step 1) Create a new project.

Step 2) Create a new custom table and add a field in it whose extended data type is LedgerDefaultDimensonValueSet.

Also, don't forget to add relationship between your custom table and DimensionAttributeValueSet table.


Step 3) Create a new form. Add newly custom table as its datasource. Then add a new tab control and tab page. Apply dimension entry control pattern on tab page. Set datasource property of tab page to DimensionControlDemo.


Step  4) Add Dimension Entry control and set below mentioned property on it . Bind dimension control field with it.


Step 5) Add a new display menu item and bind newly created form with it.


Step 6) Extend General Ledger menu and add dimension control menu item as a reference on it.


Final output.

Customize design and business logic of standard SSRS report in D365 F&O

Today, I will be discussing about how to customize or perform changes without over layering in the standard SSRS report of D365 F&O.

Let's take an the example of SalesInvoice Report in AX.  For example our client has a requirement of performing few changes within Sales invoice report just like he want additional field so we can follow below mentioned steps in order to achieve this target.

Step 1) Create a new project.

Step 2) Assume that I want to add AdditionalQty field on body of report so I am going to create a extension of SalesInvoiceTmp table and add required fields within it.


Step 3) Build and Synchronize the table.

Step 4) Create a new helper class in my case I have created SalesInvoiceHelper class and copy onInserting event handler of SalesInvoice tmp table. Add logic within the copied event handler.


Note : For the demo purpose I have added logic for this  field. Whereas as  you can add logic as per your requirements.


Step 4) Duplicate the report  and give it a new name. Make changes in design accordingly.


Step 5)  Go to PrintMgmtDocType class and copy event handler of getDefaultReportFormatDelegate and subscribe to its event handler. Add logic in the method to call this new report in helper class.


Step 6) Duplicate Sales invoice controller class  by creating new controller and change its logic in order to call your new report.

For instance in my class I have replaced SalesInvoicecontroller instance with salesInvoiceControllerDemo and called my report SalesinvoiceDemo with design Report.


Step 7)  Extend sales invoice report menu item and change its controller property to your new controller.


Before creating new extension of menu item.


After creating new extension.


Build the complete project and execute your report.

Here comes the error.


Oops. Probably I missed something and that is deploying my report. Right click on your project and select deploy reports.

One more thing go to Account receivable ->Setup -> Form setup -> Select print management
Go to customer invoice node and select your design and report there too.


Final output with our custom column.

Custom Business events Part 3 - (Activate custom business event) in D365 F&O

 In this blog we will discuss about the steps to activate a custom business in D365 F&O. As we know that business event catalog does not...