Let's start with a scenario. We are IT based company and our manager want to check which department projects are gaining more market. A person can add or update projects with different statuses for example completed, In progress, not started or pending. In order to achieve our target , avoid any mistakes and simplify our work. We have decided to create a model driven app.
Note: Model driven entity works for CDS.
For this purpose first we will create a entity in CDS and upload data in it. So ,in this part I am about to create a custom entity.
Step 1) Sign in Power apps
Step 2) Select environment which allows you to create entity.
Step 3)Click on Entities tab and click new entity button.


Step 4) Add following fields in entity.
Note : I have used option set type for status field with following values.
- Not started
- In progress
- Completed
- Pending
Another two fields added based on calculation.

Option set field : Status by clicking on New field button then on edit option set and create new or use existing option set.


Calculation fields : Add a new field of whole number type and click on calculation button and add formula.


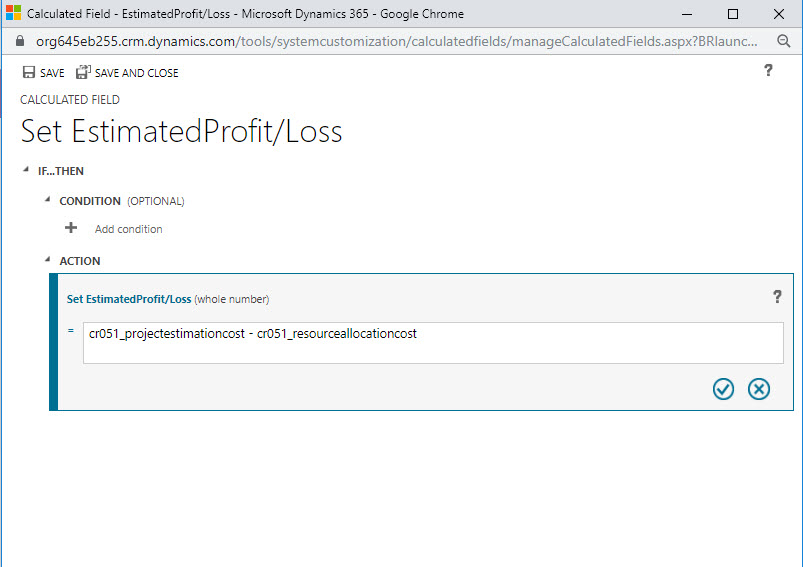
Note : Please always save your formula by clicking on save button.
Step 5) Add business rules. For instance I want to add business for resource allocation cost. If user has entered value in project estimation cost field or project contract price field then it is required to add some value in resource allocation cost.
For business rules : Click on new business rule.

It will open a new window. Add a condition and set entity property on it. It will act as If part.

Now add a new action by clicking on Add button and set its properties. It will act as Then part.

I have added two business rules. One for Contract price and another for estimation cost. After creating business rule. Click on save and activate button.


Entity created successfully. In next part we will learn how to upload data in custom entity.


No comments:
Post a Comment
Note: only a member of this blog may post a comment.